Working with EzyTrays
The EzyTray Cable Tray system is offered with a full range of accessories to allow you to assemble and work with it onsite. Here are some of the ways the product can be worked with...
The ET 'EzyTray', ET3 and ET5 are designed to work how you want to work around your project. Unlike the CT range of tray, the ET range does not come with pre-made fittings, rather, it uses accessories that allow you to bend, rise, or join straight lengths together either in series or to fabricate a tee or cross shaped connection.
To learn more about EzyStrut's range of cable trays, lookup the products or more introduction info here.
Below are examples of fabricating the ET range to work around the needs of your electrical install project quickly and efficiently.
Splice to create a Straight Join

Always use 2 splice plates per length of tray and SBH and CNH splice nuts and bolts to fasten them in place. EzyStrut splice bolts have a smooth head which should be installed on the inside of the tray's side wall. The SBH's smooth head is specially designed so it cannot damage any cables.
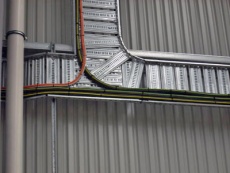
Install a Radius Plate to create a Bend

The radius plate comes in a standard 2m length, and the amount of fasteners you will need to install will vary depending on the angle and size of the desired bend and tray that you are using.
Using Hold Down Units to Secure the Tray

The ET range of trays are generally secured onto strut with hold down units. Always install them in pairs, and always secure a tray at least twice along its length.
Using the TX Brackets to create Tee or Cross style Joins

The TX bracket allows you to fabricate tee or cross combinations in the ET/ET3/ET5 tray. Simply make the appropriate cuts in the side wall of the tray you are joining a length to, bend down the side wall, and attach a TX bracket either side.
Using Riser Links to make either Internal or External Risers


Riser links must always be installed in pairs, one on each side of the tray. The quantities that you will need to use will vary depending on the size of the riser (internal or external) that you are fabricating.
If ever you need any help, EzyStrut staff know our products, and can demonstrate them.